Getting started with Solo Timesheets
Turn your automatic activity data into organized, accurate timesheets. No timers, no manual logging, no guesswork.
What is Solo Timesheets?
Solo Timesheets automatically converts your tracked activity into a structured timeline of your workday. Instead of starting from scratch, your day is already filled in. You just assign the time to projects.
Your activity data flows directly into your Timesheets timeline. No manual timers needed.
RescueTime learns your patterns and suggests which project each block of time belongs to.
Assign billable rates at the project or client level and generate invoice-ready reports.
Filter and export by client, project, date, or team member for reporting and invoicing.
Install the Desktop App
Timesheets is powered by your automatic activity tracking, so you need the desktop app installed to generate timeline data.
- Download the installer
Visit rescuetime.com/rtx/download and click Download. Works on Mac and Windows.
- Sign in and activate
Open the installer, follow the prompts, sign in via your browser, and click Activate Assistant.
- Make sure Timesheets is enabled
Go to rescuetime.com/timesheets. If you're on a Solo+ or Team plan, Timesheets will be available. If you don't see it, upgrade your plan to get access.
Create your Clients, Projects & Tasks
Before you start using the timeline, set up the buckets your time will live in.
- Clients: the companies or people you work for
- Projects: the work you do, assigned to a client
- Tasks: optional sub-categories within a project for more granular tracking
Each one also supports billing rates and currency. Projects and clients can additionally have target goals, useful for tracking time against a budget or commitment.
Once saved, your projects appear automatically in the sidebar of your timeline, ready to receive time.
When creating a project, add Hints for Autocompletion: keywords or app names that help RescueTime match your activity to the right project automatically. We cover this in depth in step 5.
Use Your Timeline
Your timeline at rescuetime.com/timesheets is automatically filled with your activity throughout the day. Assign blocks to projects by dragging from the sidebar, or clicking a block to select a project from the dropdown. Drag the edges of any block to adjust its size.
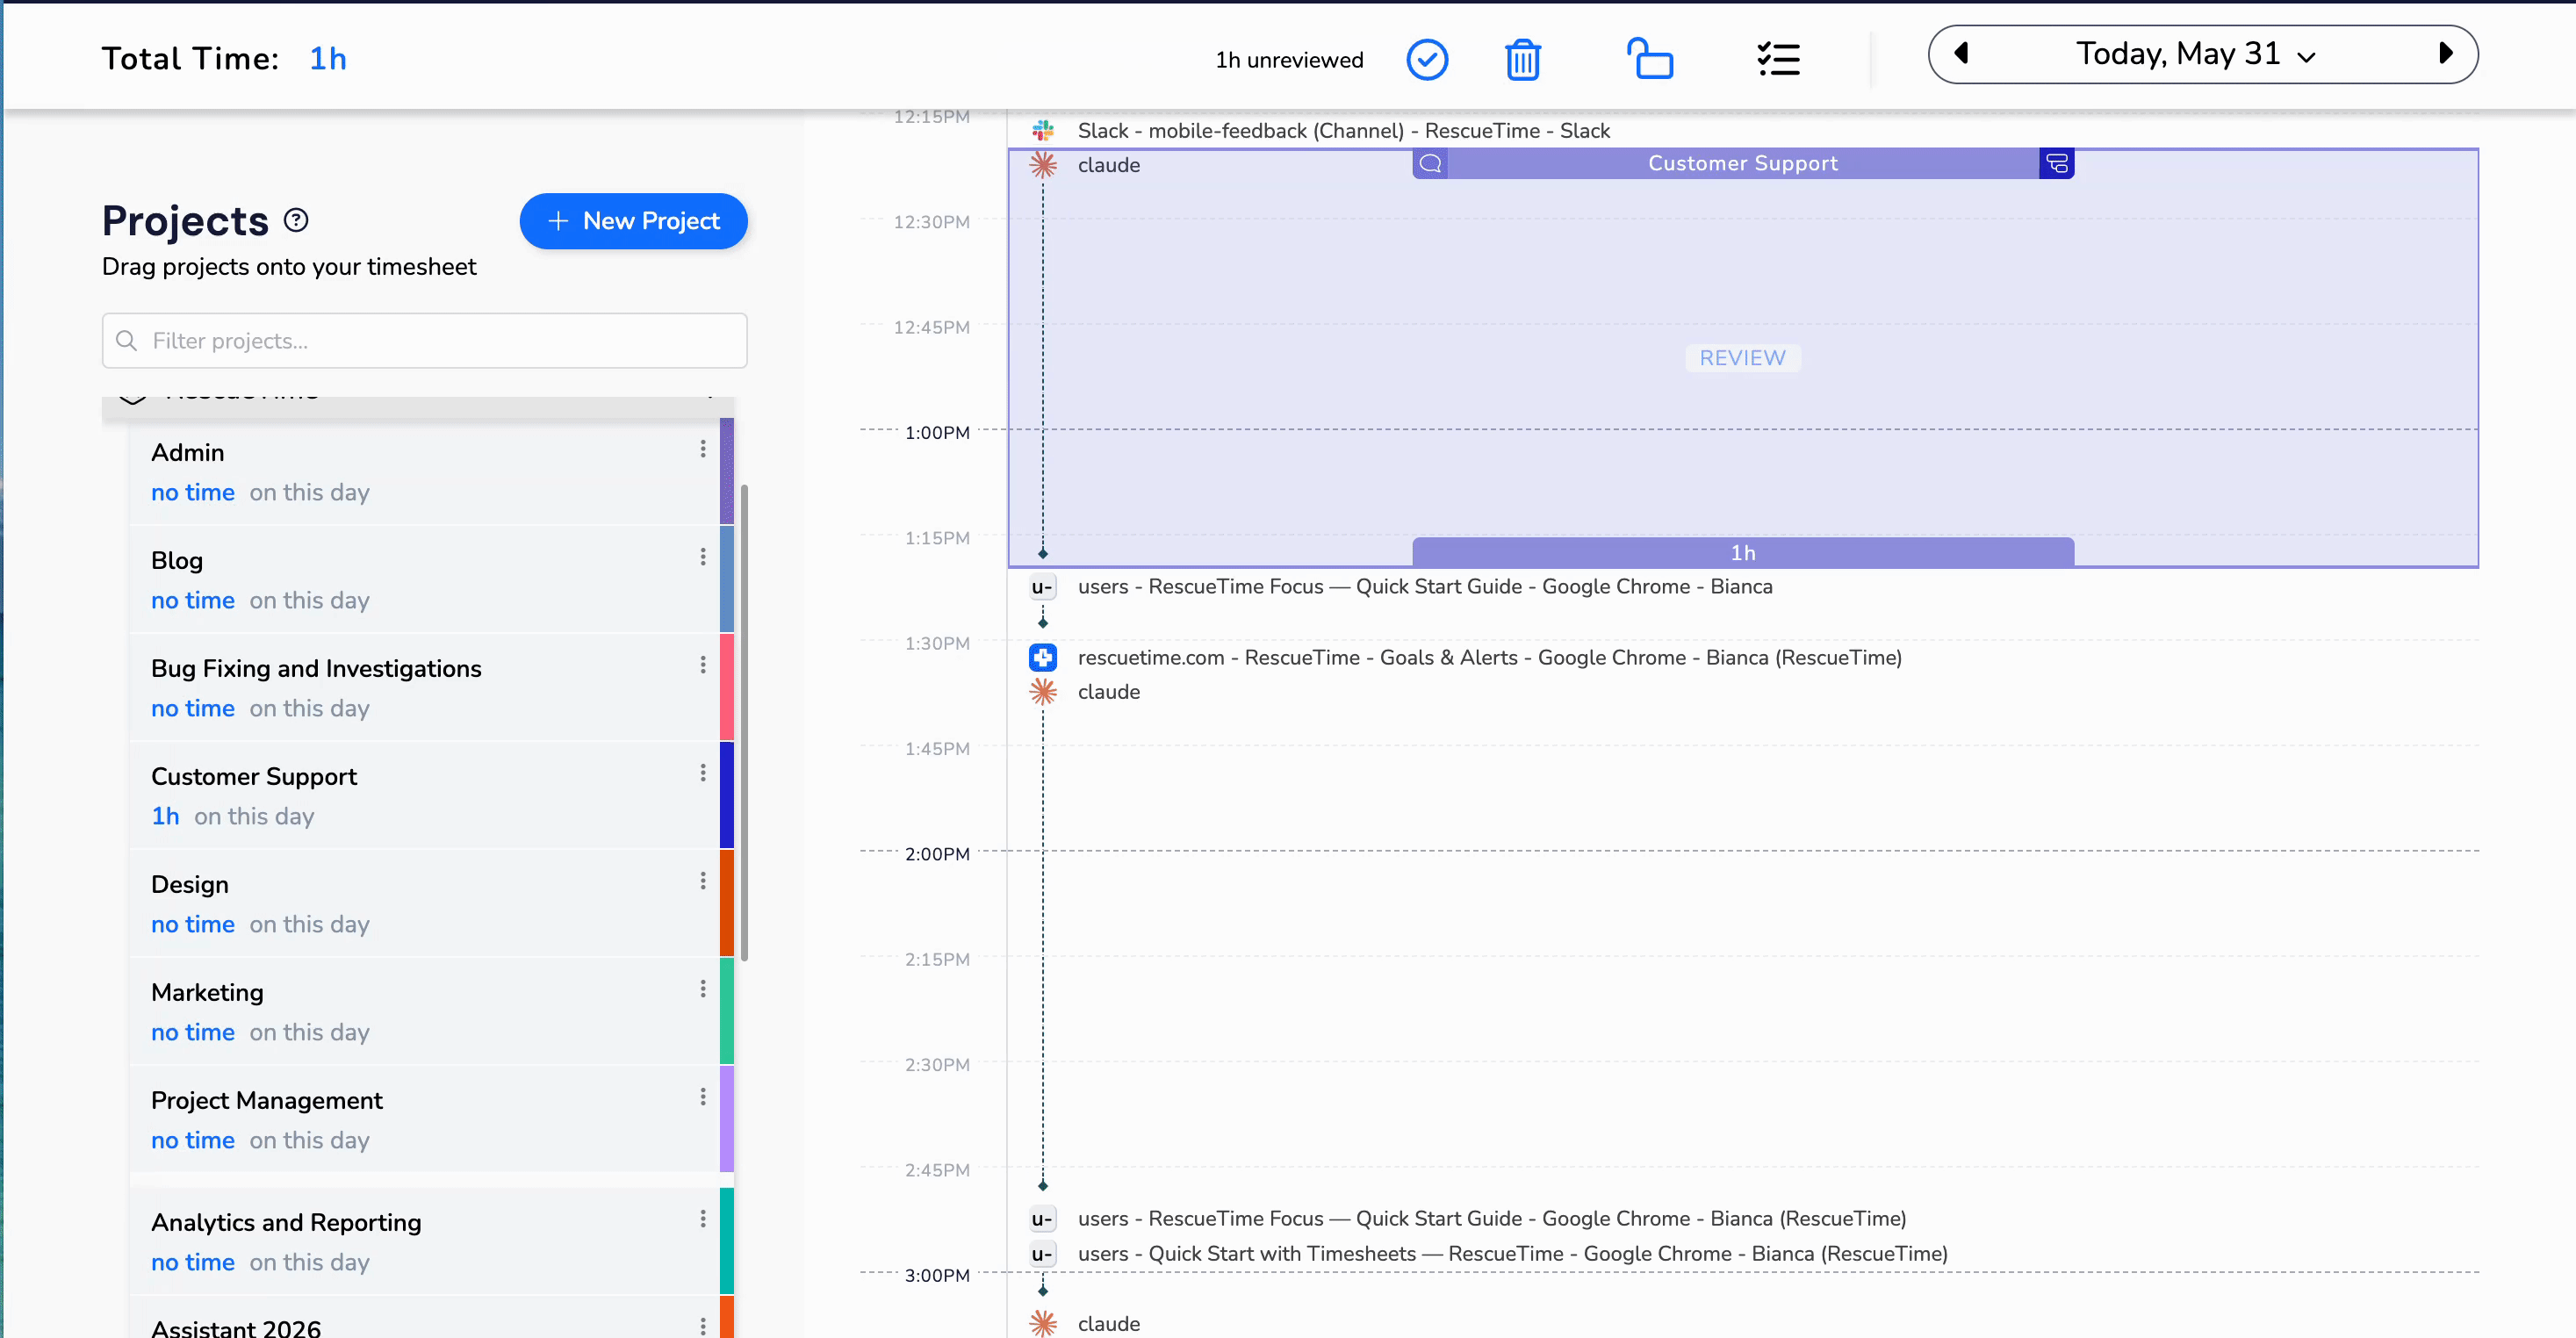
Let RescueTime Fill In the Gaps
For the first couple of days, assign time manually. Once patterns build up, suggestions take over. After a few days of use, RescueTime starts automatically suggesting which project each block of time belongs to, based on your activity patterns and the hints you set. Accept, edit, or delete suggestions. Every interaction helps it learn faster.
For more control, click the ☰ icon at the top of the timeline to open the Edit Activities panel. From there, set each activity to one of three states:
- Suggestable: visible and available for autocompletion matching
- Visible only: shows on your timeline but won't be used for matching
- Hidden: removed from the timeline entirely
Keeping the right activities suggestable makes autocompletion significantly more accurate.
Finalize your day & review reports
Finalize your day: click 🔒 to lock it. No further suggestions or projects will be added.
Calendar view: see your week at a glance and spot days that still need attention.
Timesheets Reports: filter by client, project, or date range and export to CSV for invoicing or planning.
Target Summary: track logged hours against your project goals and spot which projects are on pace.